Sunday, 22 September 2013

Project Update - Sep-13

Hello again, welcome back.

Now the holiday and wedding festivities are all over,time to crack on and build some more car! 

After the joy of the engine start and first drive, I soon realised that I would have to have a smaller steering wheel. This proved quite difficult actually, as trying to get a boss, quick release and wheel in the correct size to match all the components proved tricky! After several attempts and returns, I eventually found the right items. 280mm steering wheel is laughably small, but means I don't have to amputate any legs, and the quick release is great for getting in and out


Next up I decided to finish off the suspension settings/torque, so went round and torqued up all the bolts, and roughly did the camber/ toe in settings, at least the wheels now point straight-ish.

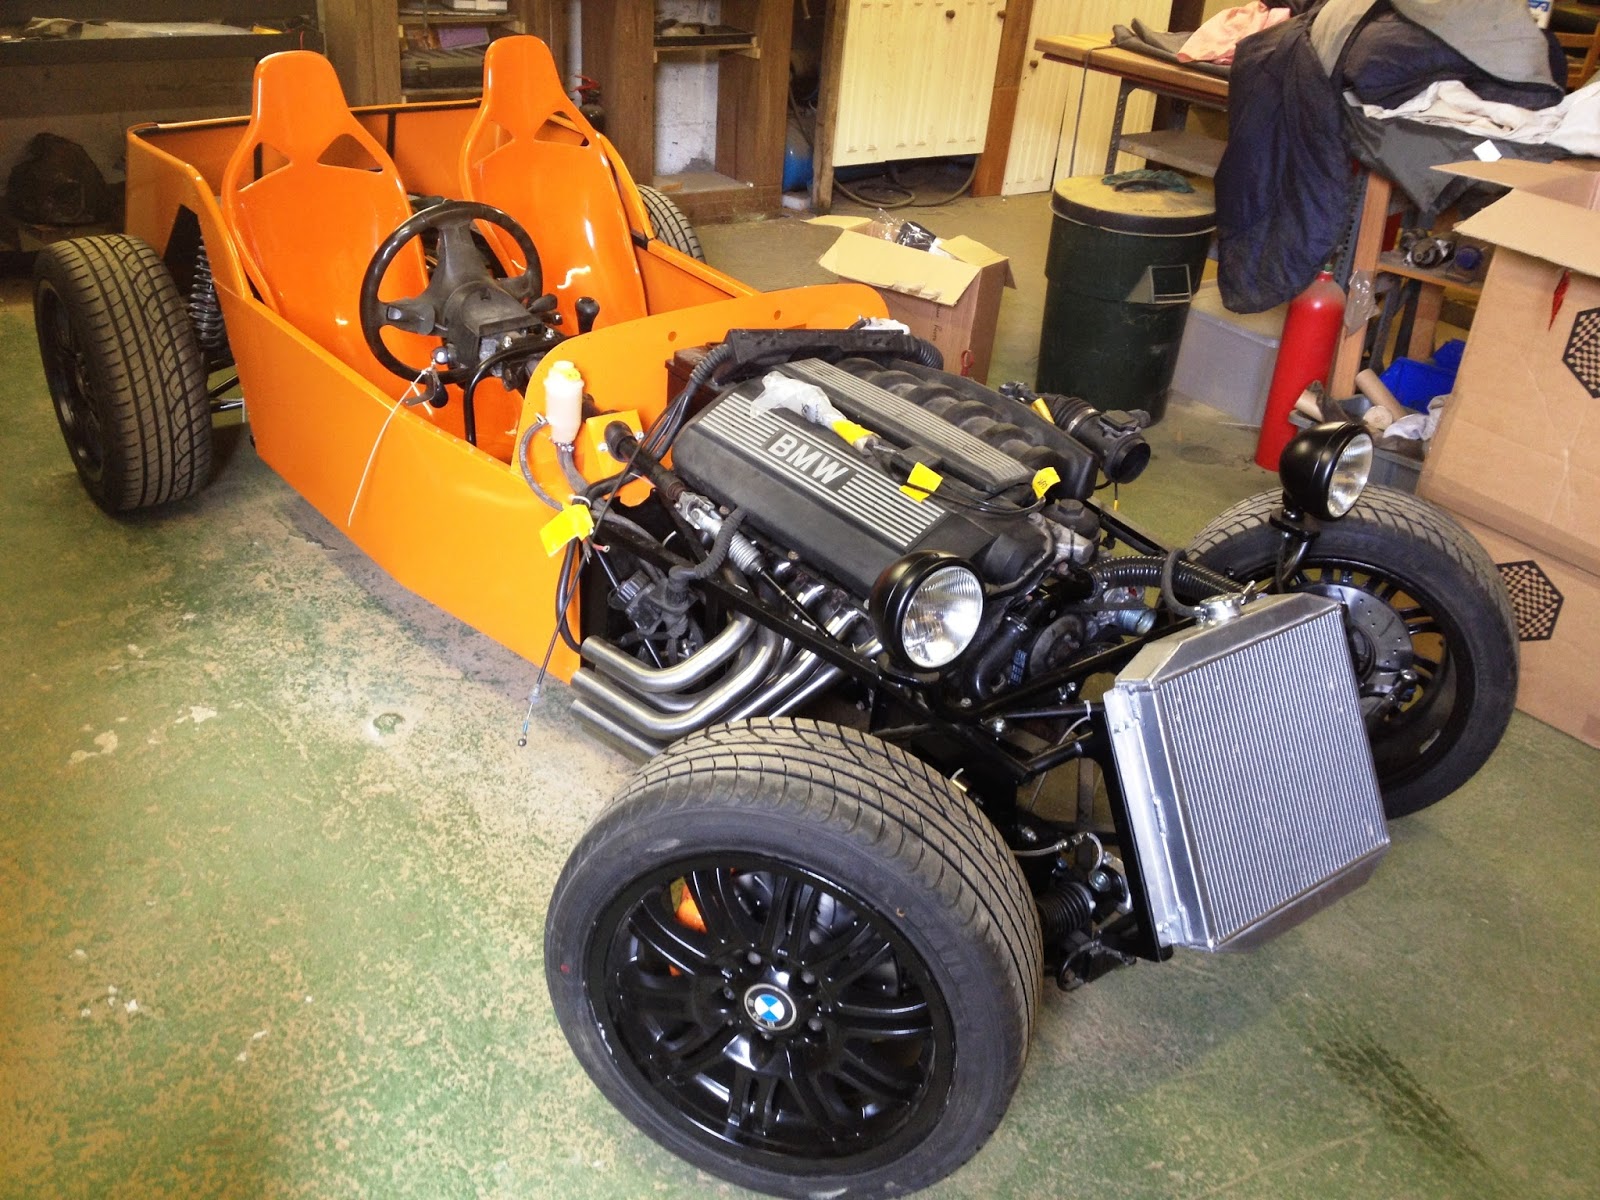
This led to me offering up the rear wings, only to find the ride height was massively too high - I had to drop it by a good 4" so that the wheel sits nicely within the wing. I decided to have the wing at the height of the lowest the car could be, so that I can always raise it if needed. As a bonus, the top of the wing is roughly right with the rear tub, so all good. 


(Resting on a block of wood on the tire)

Then, had to get both back wheels off to tighten the rear suspension bolts and re-do the rear upright lower bolts - wasn't happy with the cut-off 1/2" unf bolts so replaced them with newer ones and spaced them out with washers to get the required 3mm clearance:


(Much better, old ones I had cut a bit too short)

Then I fitted the front cycle wing brackets, bending them around the tire using 10mm packing strips as a guide


Finally, I could the offer all 4 wings up to see what it looked like!


Pretty good I should think!

I'm now musing about how to fit the front wings, Dave has some good inspiration on his blog. Plus I still need to fix this clutch. Ah well, progress being made again is something to be pleased about.

Short video here: HERE

Thanks,
Steve


Wednesday, 18 September 2013

Still Aive!

Greetings fellow bloggers.
Fear not for I am still alive and well! As is the project.

I had taken a brief pause whilst mission:honeymoon was taken care of. A superb adventure through the Pyrenees, driving the Land Rover over the mountains. Best highlight: climbing a rocky track up to 9,000ft to get this picture:


But, we are home now, and so the kit car must go on!

I only had a brief chance to return to the workshop before being forced away again with work for a few days, but I had chance to start her up (went first time) and she is purring like a kitten once more.

One slight issue though,  the clutch is dragging quite badly, still. Who would have thought it, leaving the car alone for 3 weeks didn't cure the problem. Drat.  - even with your foot flat to the floor, sometimes it just will not go into gear - it seems to vary between a slight issue to a full-blown gearstick won't move out of neutral... I'm going to try the slave cylinder, because it's had a new clutch and the master cylinder is new... But if the worst comes to the worst it looks like the engine might have to come out again... Very disappointing. My worst fear is that something has gone awry with the release bearing or the mechanism inside the bell housing. Or that the splines have gone a bit rusty and is preventing or restricting the movement of the clutch plate (clutch was installed about 12 months ago and hasn't turned since). Any theories?

The only other thing I managed to do was torque up the front suspension bolts and have play with the toe-in and camber settings to get the front wheels something like correct. I'm not too worried about 100% accuracy at this stage as I plan to take it to a 4-wheel alignment place before IVA to do a full setup, but it was starting to bug me that all 4 wheels are all over the place in terms of alignment,NAND even just driving in and out of the workshop you can see the tires scrubbing a weird pattern in the dust on the workshop floor.

Back to the workshop soon, and more tales to write up soon! Next big projects are the scuttle and all the electrics.

See you soon!

Steve

Tuesday, 30 July 2013

Not only lives... But drives

Again... Another brief update, first test drive. Recorded 0.7 miles doing this four times:-) all went well


Steering wheel is too big still. I can barely operate the pedals. Will literally have to install it for the day of the test. 

Enjoy. 

Monday, 29 July 2013

She lives!!

Very brief update... thought it was appropriate given this video...


Hooray!!

The problem in the end turned out to be an errant +12V wire missing from the starter motor...

More detailed update soon.

Sunday, 28 July 2013

Problem Solving

Hello again!

Been a bit busy working on the car of late and realised I hadn't updated this for a while so this is a summary of progress over the last couple of weeks.

Had a few minor issues to resolve/re-engineer.

First up was the steering, again; but this time it didn't become apparent until I'd taken delivery of the seats and tried to fit them.

Once the standard-diameter BMW steering wheel was on (a variant of which I'll need to pass IVA) I couldn't physically get in or out of the car!! And then when you put the wheel on whilst you're already in it, there wasn't enough room for me to move my leg to operate the pedals. Bit of a catastrophe that...

First I took the runners off the seats which helped a bit, but really the steering wheel was in the wrong place. Plus it was still sort of fouling on the suspension tower. Pics below describe the problem - figure 1 shows where everything is, and 2/3 show the problems found with it fully one way or the other:


So, that was a nice conundrum to figure out. More on how I solved it shortly...

As mentioned, I took delivery of some nice shiny seats and a lovely tiny steering wheel - once IVA is passed I can use the small flat bottomed wheel as a much more comfortable way of getting in and out - plus I've got a quick-release boss for it as well.


Orange GRP seats complete with stick-on high density foam padding and 285mm steering wheel
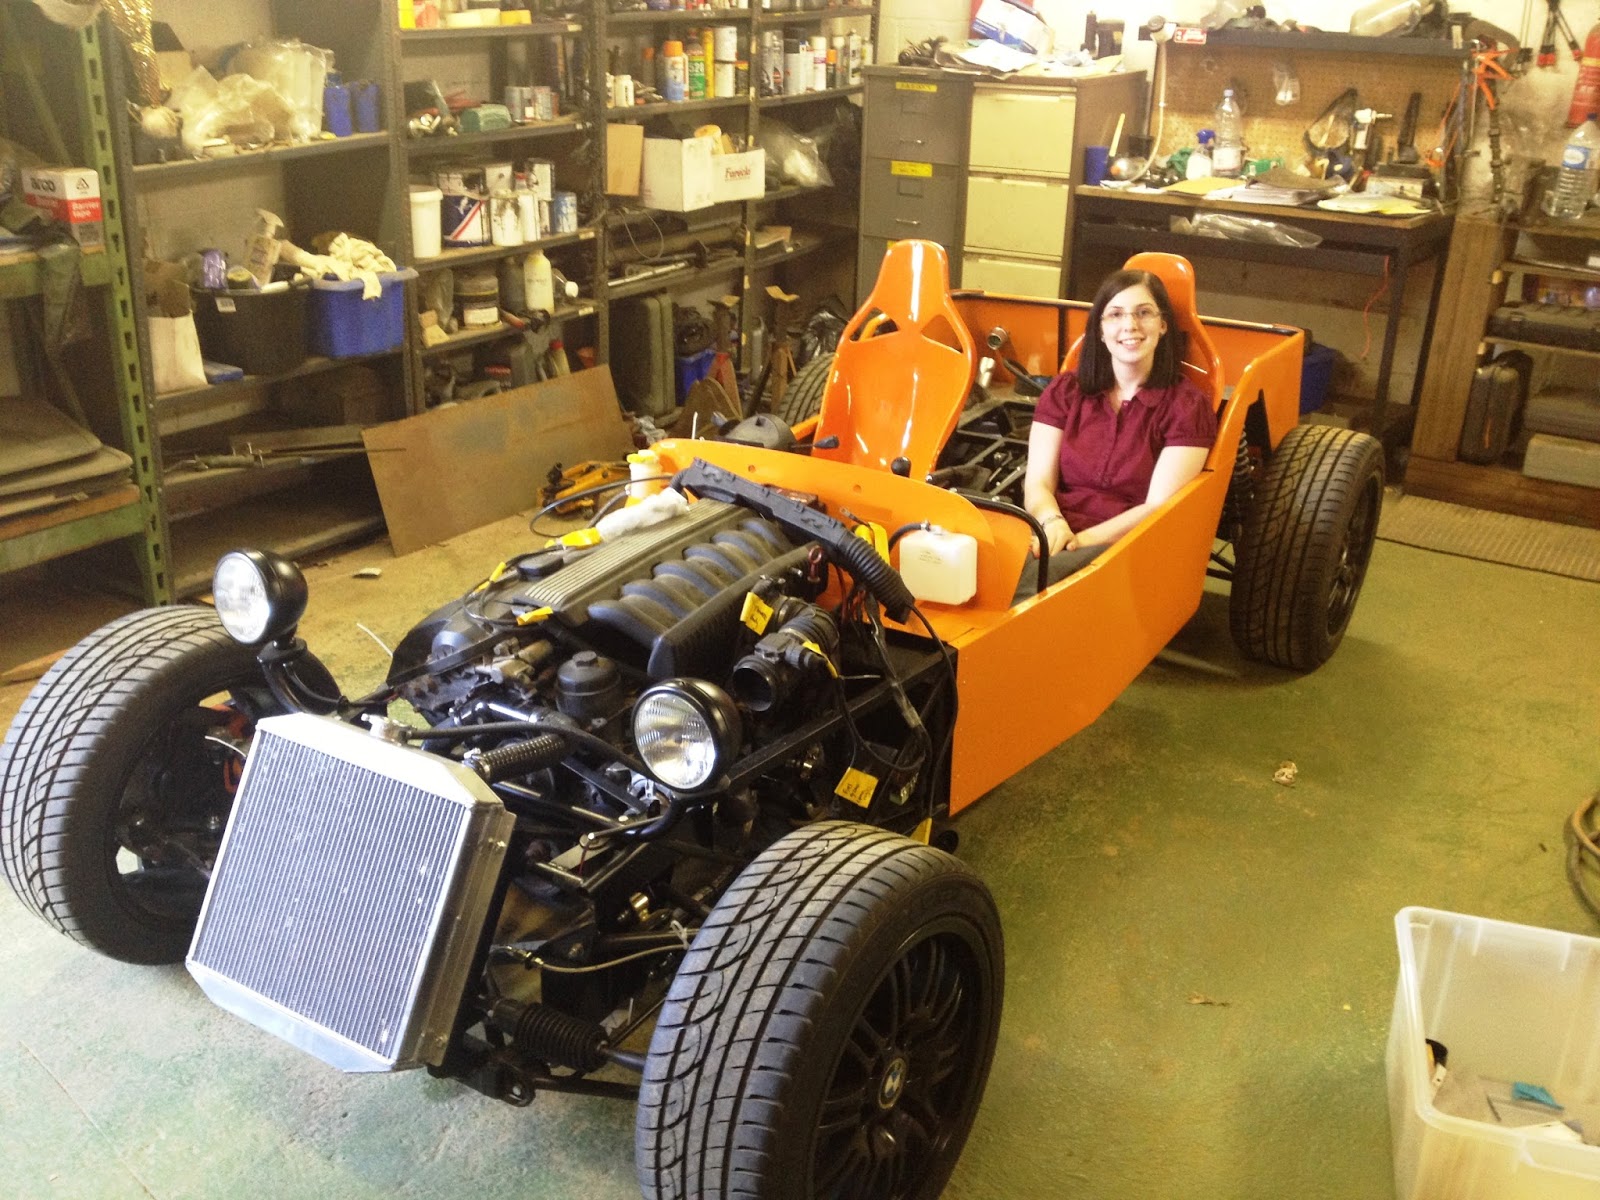
 Of course, Emma pointed out they don't actually look that comfortable, but I urged her to try them out and she seemed a little happier having done it, if not a little bewildered:

Seat-modelling for beginners

 I'm not overly impressed with the standard of laminating I have to say. I managed a project building high-quality FRP boats and I suppose I was spoiled with the excellent craftsmanship of a world-class product... but even so, I wouldn't allow a first year apprentice to churn out something as poor as this. The front (orange) gel coat is OK, but the back has got bits of dry laminate, glass poking out, and a very poor washcoat of colour. I've got some black gelcoat I'm going to re-do them at some point. Still, from afar they look pretty good and the colour isn't a bad match. They do look pretty sweet in the car:


Note the backs of the seats which will have to be re-done
And once again that lovely model came to show us all how to sit in a car seat again:


And then some ugly bloke turned up as well, but he had a scuttle with him so we let him pose for a photo too:


And he'd also brought a nosecone as well - starting to take shape now!

 I do admit to several moments of just sticking panels loosely in-place and standing back and admiring, it's terrifically satisfying if not horrendously inefficient :)

I then had to interrupt the project and spent a whole weekend sorting out Emma's Morris minor for MoT


 So much welding :( and after all that time spent on it he went and found a load more on the test... so we may have to write the poor thing off and look for a slightly better one. Whilst I enjoy all these projects I just run out of time to do them, and still got the disco to look at before our big trip. 

Anyway, back to the legend!!

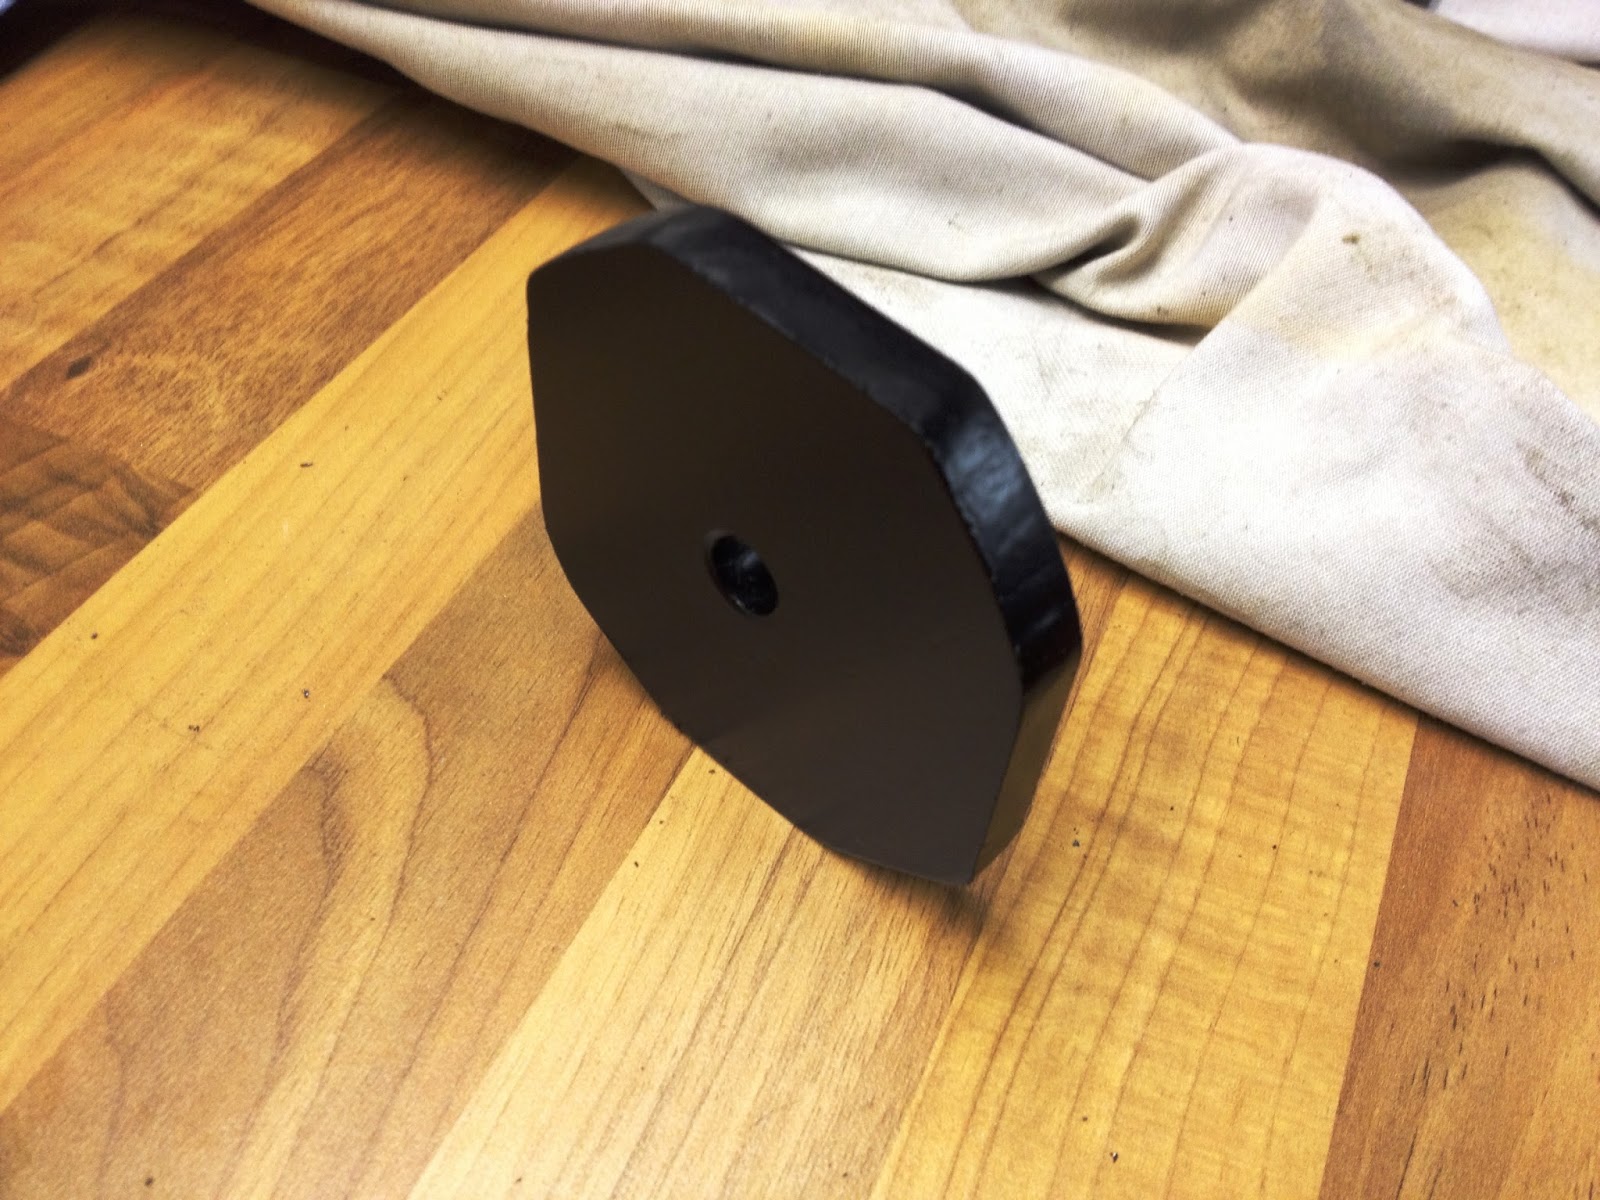
I scratched my head a bit and talked to a few people about the steering problem, and it occured to me that I'd need to move the steering column to the left of the car to help with the knee problem and clear the suspension tower, and to do that I'd somehow have to move the engine out of the way. Then it hit me - I can't move the engine left or right, but I can move it up and down! So I made up a spacer block out of 10mm steel:


10mm steel cut and shaped to the engine mount, drilled out the centre as clearance for M10 and painted satin black

Then installed it beneath the engine mount. Hey presto the engine moved up and left just enough for me to solve the conundrum. Brilliant. Only slight issue is that there's only a tiny bit of thread coming through the nyloc on the bottom of the mount - potential IVA issue there, might need to look at it later on.


Spacer in-place


I next would need to solve how I can move the upper(lower) steering column mount / BMW pillow block a bit left. Given that I'd already drilled the holes, moving half a hole wasn't going to be easy, plus it needed to be raised up a tad. The solution to this problem came from both of these constraints, in making a sandwhich plate. I looked at steel for this too, but it would have been heavy and unnecessary, so I elected to use Epoxy GRP strip, which is incredibly strong but very lightweight.

Cut out the rough shape:


Drilled the holes and painted to match the rest of the car:


And the finished article installed in-place. 

Looks practically original:


This then allowed me to re-jig the steering and hey-presto, no more fouling:


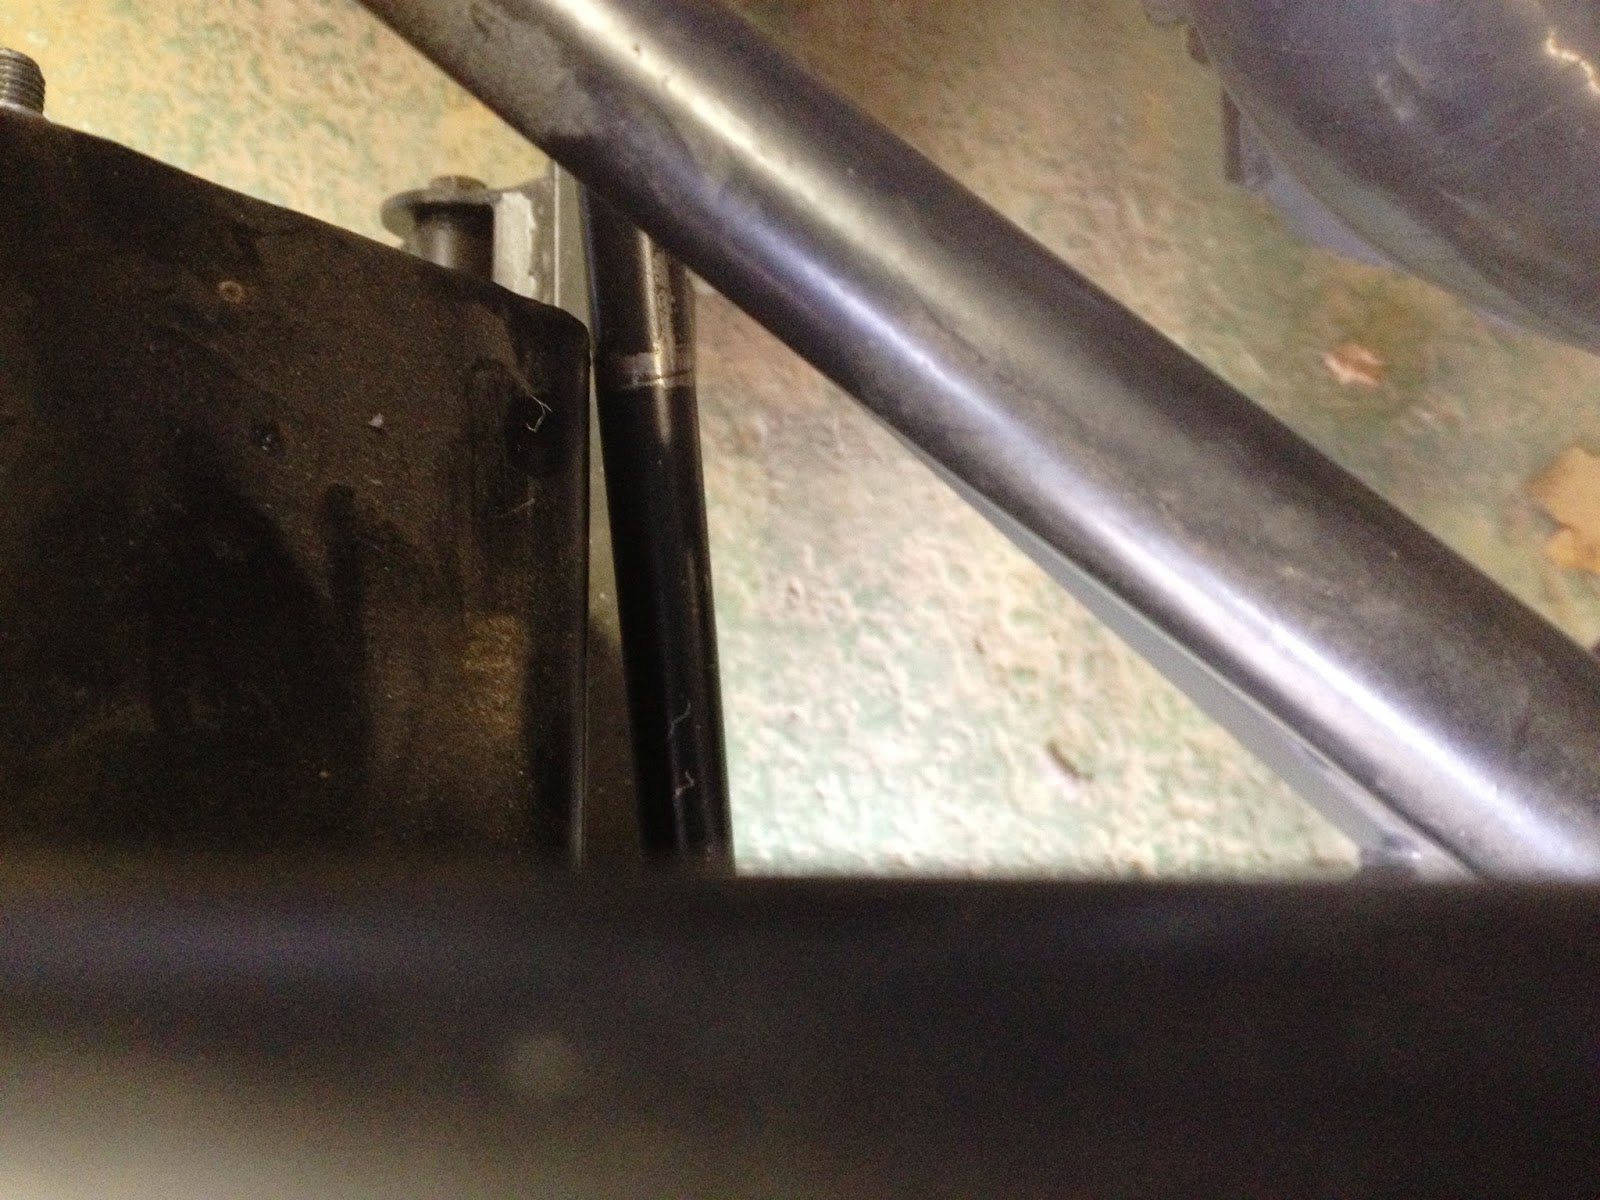
Lower steering column doesn't foul. Pic doesn't really show it that well, but there's about 3-5mm of clearance. Will have to touch up that scratch with paint so as not to arouse suspicion
 I was also able to find a place for the steering wheel to sit that would allow knee room, although at the sacrifice of having to bolt the seat directly to the floor - no seat runners. Unsure if you HAVE to have adjustable seats for IVA...? Have to check the regs. 

Next up - electrical string.

Finally, the greatly anticipated wiring loom was delivered:


 I wasted no time in getting it all laid out and ready to install:


The loom is simplicity istelf - all the connections are labelled, so it simply is "plug and play". My advice if you're considering a project such as this, is that this is not one area you should skimp on the project, especially with a modern car with ECU and anti-theft systems. This has really got to be right. And the GKD loom is well engineered and put together and tested.

When I unpacked everything I realised that I'd need to solder on the connections for the instrument cluster. This generally went OK, although there was one cable that didn't match up colour-wise to the GKD instructions. Not sure if it was important so I left it off. (thinking I might later regret that) There were a few more that just aren't connected (things like brake pad wear sensors, cruise control, SRS, airbag etc.) and a few I had to check with Peter on (M3 dash has oil pressure built-in, mine doesn't etc)

Good few hours hunched over with soldering iron
 Then, the big moment arrived - I connected all the bits up...


And, nervously... turned the key to position one.

Firstly... no bangs, smoke or fires. Which is a result...

At position 2 we have battery warning light, oil pressure light and fuel pump priming the injectors. Again, good news.

but then at position 3.... click. Click, click click. Nothing else. just a click from the starter motor solenoid. Bugger :(

Also noticed that I had no odometer/display, and the fuel gauge and temp gauge weren't working either.

I continued faffing for a little while and had a chat with Peter and a few other friends around, checked all the obvious things such as earth leads (good earths, 0ohms resistance on all of them) all power leads connected including the superflouous jump start terminal, battery charged (12.6V), good clean battery terminals (cleaned them again, still no change) and then gave up and went home, feeling a bit defeated..

Next day I attacked it with a fresh vigour. I re-made the connections to the battery (no change) and checked the earths. I also noted that I'd lost the oil pressure light on the instrument cluster, will have to look at that one at some point.


My initial worry was it was the anti-theft or ECU related, but it was fairly clear that the starter solenoid was clicking and the fuel pump was running - if the EWS wasn't activating, neither of those would be "allowed". This is some small victory because at least that side of it is OK.

So I resigned myself to it being the starter and set about taking it out - which is a right pig of a job...


I then bench tested it:


As you can see from the video it does engage the solenoid several times and then fail to turn - precisely what was happening in the car. BUT it then finally starts to turn.

With that I thought it was just sticky for having stood for 18months so re-installed it back in the car.

Same problem... just a single click when turning the key. When you turn the engine over by hand afterwards, you can hear the starter disengaging with another click, so it COULD be that it will turn freely under no load, but won't fight against the compression of the engine.

So... I took the spark plugs out... still no joy, click click etc.

I finally resigned myself to the fact that the problem must be with the starter motor and as a replacement is fairly reasonable £60-£80, probably best I pay a visit to my favourite shop, and he can test starter motors and alternators and at least prove to me that this one is a dud. For info the engine turns over lovely by hand - good compression, but smooth enough. In 5th gear you can push the car forward (just) and that too turns the engine over, so the engine itself isn't seized.

So that's where we are with it at the moment... My initial plan is to get the engine to turn over and then bring the oil pressure up, and once I'm happy it's got good lubrication is stick some petrol in and see what happens. But, need to find out why it won't turn at the moment!

Keep watching for further updates!! Any help gratefully received...

Sunday, 14 July 2013

Lots of little bits

Welcome back.

With these ridiculous temperatures this week it's taken some dedication to keep focussed on the build and not run away to a beer garden in the sunshine! Actually, wait, who am I kidding? Of course it hasn't :-)

All the painting I did was dry by Monday so I went up and arranged the panels and check them over for defects / colour match etc.


 Again, not strictly necessary as the paint is all from the same batch, but it looks cool and makes for great photos on the blog!

All looking good. I also sat in the "seat" for the first time with the bulk of the panels on to see the view of the road ahead. Bit of a different driving position from that of my 4x4s... looks like I might be able to sneak under my Rangey from this angle!


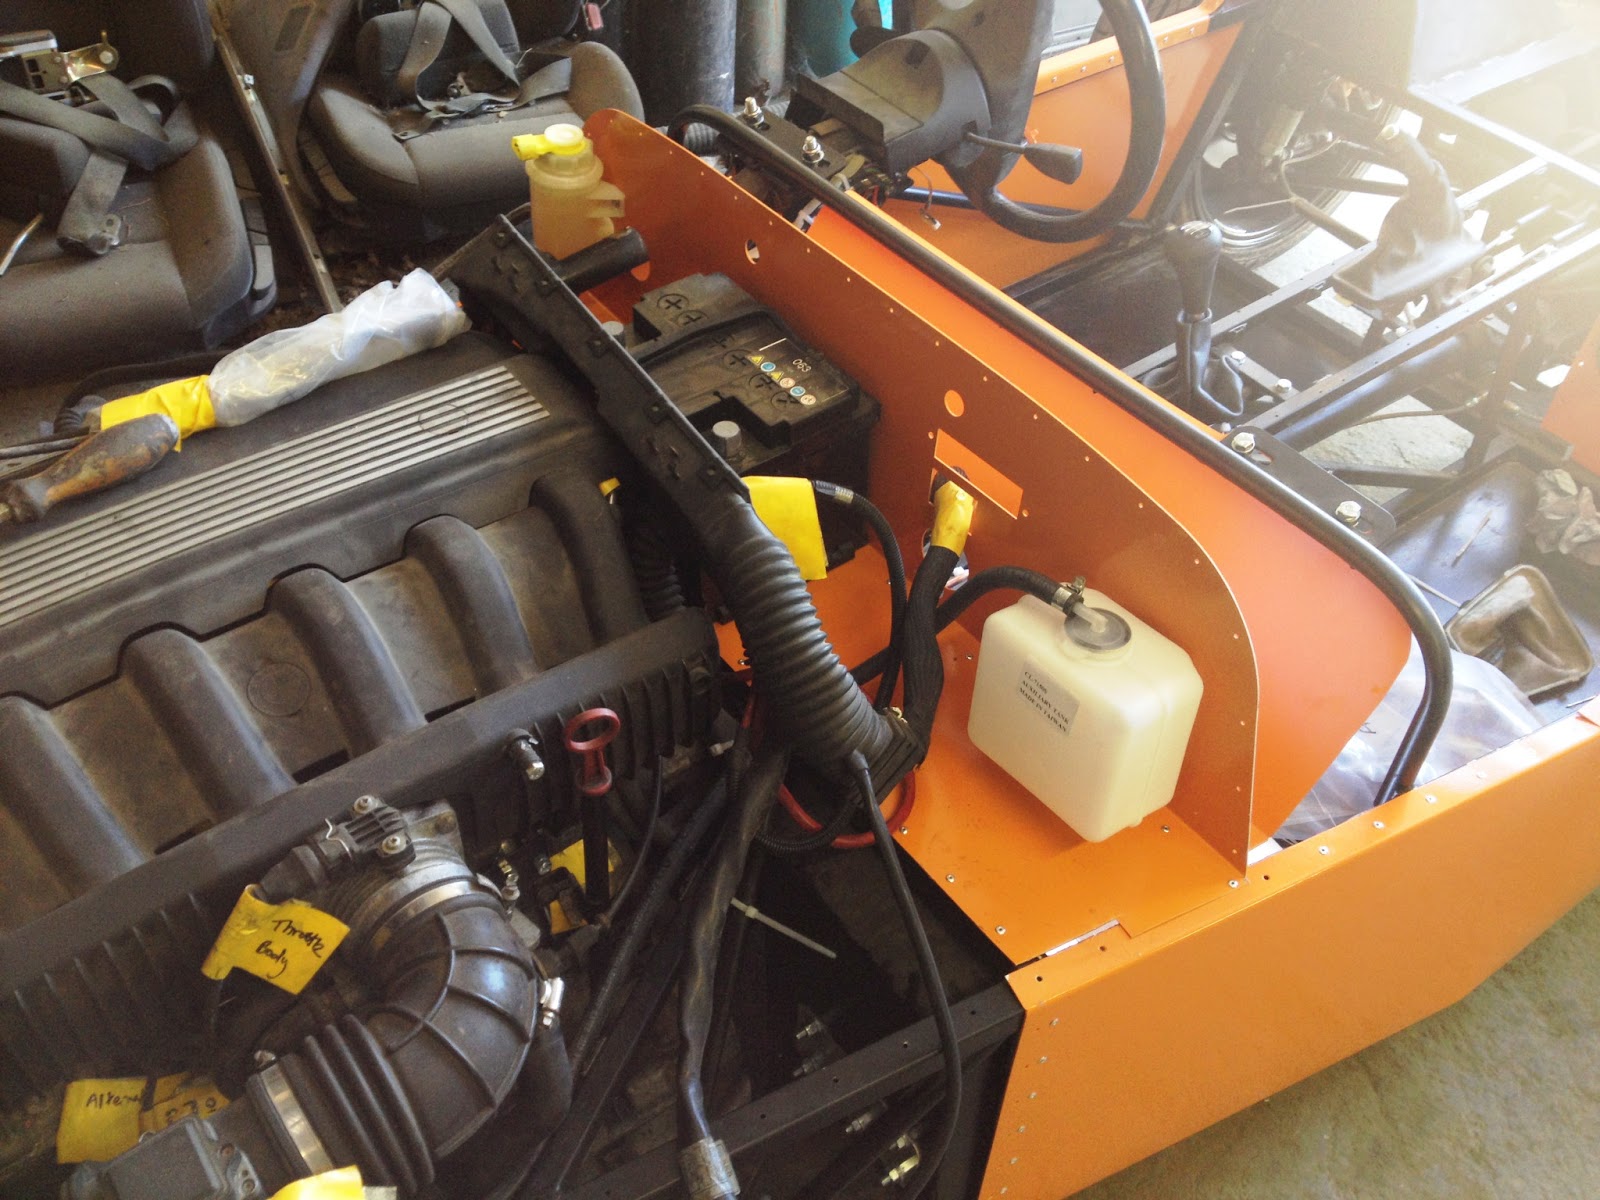
So, on with the serious stuff then. I finally decided to launch into the securing of the panels. As I haven't got the loom yet, or torqued the suspension bolts I can't button them all up, but I figured the forward transmission tunnel ones should be OK, and as they are steps 3 and 4 in the assembly instructions, figured it was probably about time I tick them off!!

Note the expanding foam to fill the panel gaps and make waterproof


A note on building out of sequence - for various (good) reasons I haven't done things in the "correct" order, and that has caused a few minor inconveniences along the way, but I totally accept them and if it weren't for the fact of getting things moving and progressing I'd probably still be looking at a big pile of bits on the floor. At the end of the day, it's a hand built car, and if you encounter problems, you solve them. So far that mentality has both solved and caused problems, but it's still going well!!


I used clear silicone sealant to seal the panels to the chassis - don't want water getting in. Have to say that was a stroke of genius, because it's see-through you don't have to worry too much about getting it all on the same panel (e.g. where the orange meets the black) and effectively it's invisible when dry so you can make a better job of sealing it to prevent water ingress rather than being fastidious about it looking 100% neat.

I then riveted the ally bulkhead on, and just as the last pop rivet was banged home, I realised why you aren't supposed to fix it in place yet... (remember earlier paragraph... this is one of those times) I quickly chucked on the nosecone and threw on the bonnet and scuttle... and yes, sure enough, the scuttle is about 20mm too far back. D'oh! But that's OK, I'll just trim the nosecone to move it back slightly to suit., or think of something else to solve that little pickle!


Nice and shiny, well secured and sealed... just 20mm too far back

I then put on the side panels and sealed them in place
 

 And the little quarter panels that caused all the grief last week


 Lookin' good! 


Then, Saturday I came up and set about a few jobs. I was supposed to be looking over Emma's Morris 1000 as it's MoT is due in <2 weeks, and I failed miserably (totally actually) and ended up spending the whole day on the kit car. Oops. Don't worry though dear... I'll get the moggy sorted!

During the week I'd had five attempts at trying to source a fanbelt. I know it was 5, as does Emma; because on the way home from work every evening I stopped off at GSF to buy yet another different type of belt. I knew it was 6 ridged, but all attempts to guess, measure, calculate, make wire templates and ask around; drew blanks on the precise length. Even the guys at GSF were wondering what on earth I was playing at. In the end, the goldilocks belt was a 1,045mm long, and the DAYCO part number is  6PK1045. For the benefit of search engines: GKD LEGEND 328 Fan Belt Auxiliary Drive belt Alternator Water Pump 6PK1045

It was still a bit of a struggle to get on, I had the 1050 on first and it was too loose, but to get the 1045 on I had to loosen the alternator and find the "sweet spot" on the tensioner. Now it's on and on the longest stretch of the belt you can twist it 90° and no more. Perfect. Not too tight, not too loose.


Fitted! At last!

Because you are changing where the tensioner applies itself to the belt it's a little more tricky to fit. The tensioner moves in an arc, and before hand that didn't matter, but now the arc is right in the path of the belt, therefore move it too much and it begins to tighten the belt again. Once I figured that out I realise why I kept having a hit-and-miss time with all these belts!!

Next up was to re-fit the steering column. I got so fed up of the ruddy thing sliding off that I made myself a home-made speed clamp using an old silicone sealant gun and welded some box section on it:


That all went to plan, and with the now straightened steering column on, steering is restored and it doesn't foul on the chassis (hurrah) but it is very very close. Time will tell if that's a pass or fail. If that's the only thing it fails IVA on, then I'll eat my hat / be very happy. 

Next up - Radiator hoses. Fixed them on thanks to pics and inspiration from Dave Rodgling and Steve from Tullinge. I don't think I was supplied enough jointing pieces in the kit, and I wasn't quite sure if you were supposed to use one length and chop up into thirds (although it was quite small already) I cut it in half, and made up another piece from some pipe I had of the correct diameter. They passed the "blow through them like a trombone with your glove on the end" leak test, but if they leak water I'll have to re-do them in the future.


With the heater hose and coolant pipe on the block blocked off, the cooling system just needs the expansion tank, radiator cap and fan switch; and then it's complete. Expansion tank connected to the top of the rad with the little rubber hose:

Expansion / de-gas bottle fitted

I'm still waiting on the fan switch and I need to get a radiator cap, but otherwise it's complete. When they turn up I can fill up the cooling system and leave it for a while to check for leaks. 

Regular readers will recall last time I had a problem with the fuel tank mounting. I had a good conversation with Peter in the week, and he informed me that the brackets were designed to go on top of the chassis box section, where I had installed them underneath. So this was the first thing I tried.

Sadly, this was to no avail. There simply wasn't enough room to get the tank any higher up. I tried twisting, wriggling, shimmying - all sorts of "ings" including swearing... but it wouldn't work. I then came to the conclusion that either the tank was larger, or the stop on the chassis had been welded on too low. Perhaps a consequence of having a 2012 chassis and a 2013 fuel tank? Who knows, but a good Engineer doesn't give up. So I solved the problem a different way.

I cut and re-welded the brackets so they would support the tank all the way along and still bolt onto the bottom of the chassis

Chop-n-weld

2 coats of satin black, ready to be refitted

Job's a goodun!
All worked very well. The tank sits evenly and firmly/securely; as well as the bracket supporting it along the whole length as opposed to just a pinch point at either end. I was going to start the second one, but then the phone rang and tea was ready :-) Time to give up for the day. 

So that leaves us this week with the car looking like this:


And owing to a need to sweep the workshop... and satisfy the inner child in me... another low-power test drive


Progress wise, we are getting close. About 60% of the list is ticked, the "snagging" list is growing and getting ready for the all important engine start.

System checklist using the Haynes book of lies as a guide
Engine - check. Needs oil and a filter but otherwise complete.
Cooling, heating and air conditioning - need radiator cap and fan switch then fill.
Fuel system - need to connect fuel filler neck hose, otherwise complete
Exhaust and emission control - need to fit 3 into 1 (twice) and 2 into 1 and silencer, fit lambda sensors
Starting and Charging - complete
Ignition - complete
Clutch - complete and working
transmission (gearbox/prop/diff/halfshafts) complete
Brakes including handbrake complete, handbrakes need adjusting
Suspension - torque up bolts and set camber/castor/toe-in etc.
Steering - complete
Electrical - FAIL :-( due to the pesky IVA regs changing the rules on the foglight, Peter will have to re-design the foglight arrangements. Which is a real pain because that's the only thing holding me up now!! Hopefully a solution is on its way...


Thanks for reading, see you next time