Sunday, 30 June 2013

A Tyring and Exhausting Week

Update for this week's activities...

Not a huge amount of progress, fewer hours spent in the workshop, and the hours spent there seem to have had many interruptions and visits etc. - nice to see people and it's great that they're interested in the project, but it sure does slow you down!

The week begun by fitting the panel on the offside front of the chassis. Even with the right-angled drill I couldn't get underneath to drill the rivet holes, so had to hoist it back up in the air temporarily


Panel Fitted and rivet holes drilled

"Arty" shot of the underside, proving it's more and more like a car! Also that I think I'm going to have to do something about that sump

Once this was complete and taken off, I then fitted the manifold - which truly is a wonderful thing. Can't decide whether it's more art than science, but it sure is beautiful and incredibly well made. As one line item it's incredibly expensive at about 10% of the whole build cost, but, worth every last penny. Bet it's going to sound awesome as well!


Took me a few goes to get it fitted correctly, and I found the correct order was 1,2,3,6,5,4 in order to be able to get to the studs. Some of them were a bit tight going in, hope the threads are OK as I wouldn't like to imagine how on earth you could helicoil a thread on cylinder 6!!

Next up, make a cardboard template

Weight saving measures - make all body panels out of cardboard


I then used this template to cut out the original - and as suspected I had to make the hole much bigger than the template, as the ally panel didn't flex as much as the cardboard!! I'm only about 80% happy with the hole at the moment, I think it's a bit too big, but necessary to get it over all the pipes. After it's painted I'll re-assess the situation, and might make up a closing piece out of brushed stainless and have it in 2 pieces with a row of shiny cap head screws riv-nutted into the panel. We shall see.


Panel fitted (for now) Got to be painted soon
The weekend saw me cracking on with the radiator and fuel tank. Going to post these pics here for convenience of posting on the forum, but if anyone has any suggestions please post below.

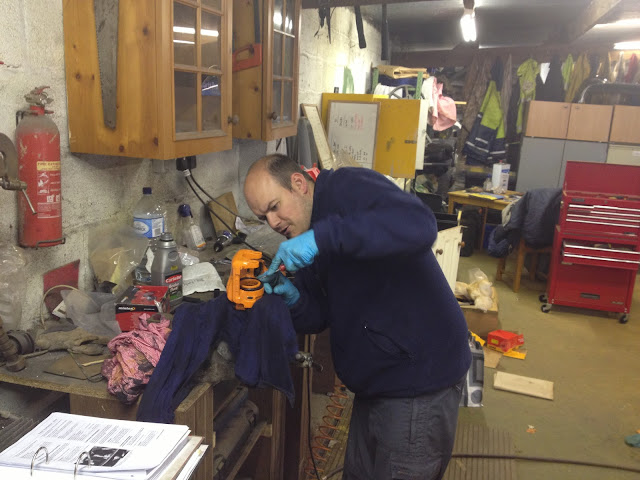
radiator was relatively easy to fit, had to dry-fit the nose cone to ensure it was positioned correctly up and down. I then tried to fathom out the mystery of the hoses and how to plumb it in, but didn't really get anywhere. Any ideas?
Coolant pipes... but which way around?


 I then fitted the fuel tank, which went reasonably well, but not happy with the straps. Also the piece of pipe to connect the filler neck on the tank to the fuel cap was just a tiny bit short, but didn't find that out until after a good bit of grunting and swearing. Once more, decided to give up as it didn't seem to want to work, plus other builders I've seen have a pintle which the breather connects to - mine didn't. So where does the breather go from the top of the tank?

Fuel Tank Fitted, but not happy with the straps

Aforementioned strpas - not touching the tank in the middle

 Next I started to put the senders/pump assemblies in, once again coming up with a few queries. I did a great deal of lunchtime reading at work this week on the BMW Fuel delivery/return system and learned quite a lot. I even found a great paper that looks like some guy's thesis (HERE PDF download) where he fits twin fuel pumps in either side. I got the pump/sender assembly in the offside, but the nearside has this huge hose attached to it. Apparently the 328 cars suffered from fuel starvation, beacuse the tank is a huge saddle shape and the pump can empty one side faster than the other. This device effectively splits the fuel return coming back to the tank and the hose sends fuel up and over the "saddle" right into the pocket where the pump is operating from. Nice idea, but the GKD fuel tank is a straight tank, so shouldn't have the same problem. Ergo - do I need that whacking great hose? Considering it's incredibly difficult to get in the tank - plus it seems to be getting in the way of the float arm for the resistor. Shall I just cut it off??

What to do with you...? Nurse - Scalpel!
 So I finished up the weekend with the car looking like this


Progressing towards that ever-important engine start
 Emma says the car looks like Brum... I resent that, but I see what she means


Good news is that someone from GKD is going to be in the South West this week, and he has the one remaining Ally panel, the driver's side main panel. Which means I can get that drilled and then crack on with the next batch of painting.

I've been stumped by a few questions this week and if anyone can help I'd appreciate it:


  • Fuel tank fitting - do you need to Bolt through the top of the bracket, or is it enough that the tank straps wedge it up against the top bracket? (e.g. the one just beneath the boot floor)
  • Are the straps OK like that? They don't look quite right to me, only way I can think of rectifying it is cutting and welding them shorter.
  • Which way around is the rad connected up - I'm thinking the nearside exit of the thermostat housing goes to the top of the rad, the offsite exit goes to the bottom of the rad, and the radiator pressure cap pintle goes to the expansion tank?
  • Suggestions on what to do with the nearside fuel sender?


And if anyone hasn't seen it... I've made a short montage of progress to date

http://www.youtube.com/watch?v=NFNOxqstGKE&feature=youtu.be


Cheers,
Steve

Sunday, 23 June 2013

Best day of the project (so far!)

It's been quite an exciting week on the build, lots of pics and a big update ahead...

It started out a little frustratingly having to un-do the inlet manifold. I was sorting through some of the old bits from the donor car, and coincidentally reading up on the fuel injection system, when I realised that I'd taken off the idle speed control valve and the oily mist seperator - both key systems which I'd earlier mistaken for secondary systems such as evap and seconday air injection. So I had to remove the inlet manifold (in istelf no small task) and with a fair amount of effort, hassle, research, forum reading etc. I managed to figure out which way around it was all plumbed in. (thanks to those who helped me, particularly Trev and Dave Rodgling from gkdoc.com)

earlier removed ICV, and hose from the manifold  that I'd already blanked and filled with gunk, will have to be re-made
ICV and Crankcase Ventilation reinstalled - lucky I kept all the brackets etc. from the donor

Then on Saturday morning at 0927... this happened...

Hasn't got a shiny nose, a sleigh or even a cheery disposition... but it might as well be Christmas

I seem to have had quite a few Christmases already this year, but this was an additional one - all the remaining components to get me to a rolling chassis. (thanks GKD! Particularly for rushing it through for the weekend for me)

Rear Track adjusters, front uprights, steering shaft, rack extensions and column bush, fuel tank straps and fuel cap - Thanks GKD!!!


 So it was straight up to the workshop and on with the goodies. Pressed the bearings onto the stub axle, didn't really require any effort at all, and then tightened up the hub nuts 250ft-lbs... that's mega tight to the uninitiated and took a good dose of grunt and the almightiest of my torque wrenches:


I then did the rear track adjusters. No pics because it didn't photograph very well, but all didn't go quite as a planned. There was quite a bit of powdercoat in the threads, and it was difficult to get anything in there to clean all but the first two or 3 threads. With hesitation I gingerly wound in the rose joints, and then my worst fears were confirmed when they went tight after the 3 threads. I took them out only to find that even after only a finger tight application of torque, the threads were a little bit chewed. They are also left handed threads so it's not the sort of tap you carry as in stock... so a little bit frustrating, but I decided that there was not much else to do except shove them in and worry about it later. Think I'll end up buying/making a new set and perhaps painting them instead. But, rear suspension complete(ish) for now.

 Next up, front brakes. My mate Trev came up to offer a helping hand, initially more for the brake bleeding and the big event coming up shortly, but an extra pair of hands was most welcome and allowed us to team up and get more done.


Trev building up the front caliper with new seals

 Finally, all four wheels attached and looking awesome... (the car, not you Trev) it was time to bag the first major milestone - Drop it on its wheels!


Pre-flight checks
 Started by lowering the rear, in the end settling to use a strop around the diff


 We then did the same on the front, note the use of cleverly positioned blocks of wood to prevent the crane fouling on the suspension

Heave...
 And then, finally, she sits on her own wheels!

The Legend has Landed


 This took a fair while, and we wanted to ensure we did it safely to risk damaging the fragile fleshy extremities that we humans have grown quite attached to, and also, risk damaging the car. (According to Emma has actually now reached the point where it can be referred to as a "car")

So after a monster tidy up session, it was time to go home and call it a night.

The next (Sunday) I found myself in the fortunate position of having 2hours before the official functions of the day were due to kick off... plus I was told to "disappear up to the unit" instead of moping around on the Internet and reading kit car magazines. My new wife does indeed know me well.

I decided that the steering should be easy to tackle in this gifted time period.

I attached the upper column to the lower column and got the steering to actually steer - that was another exciting moment. I then had to fine-tune the position left and right between the top UJ hitting the crankcase, the steering wheel being roughly centred in the cockpit, and the lower fabricated column fouling on the suspension upright. Think I got it roughly right, but there's a bit of a kink in the lower fabricated shaft. Might have to come off again at some point to be straightened, most likely done by the grumpy postman who either isn't paid enough to care, or just hates people.

It also looks interestingly close on the exhaust manifold, haven't yet fitted that... could be some interesting manoeuvring in the not-too-distant future

Steering actually working!

As that didn't take too long, I decided it was high time to get her outside to see the sunshine. Plus pose for a few photos, and give me a chance to properly sweep the floor which had been covered up since February-11 when I got the chassis, so I used the trusty Landy to help pull and shove and did a bit of pulling and shoving myself;

using one of my favourite mantras "Pics or it didn't happen" I'll let them tell you the rest:


 There was also a method in my madness - I was able to winch it up to the top of the yard and "drive" it back down into the workshop, to test the brakes and steering. It was quite possibly the world's dullest, least powerful and slowest test drive, but a test drive nonetheless. Hence this being the best day so far!!

I did learn a few things from the exercise
  • Wheel setup needs to happen - at present all four wheels point in different directions and even at 0.005 mph you can feel the tires scrubbing. Will be able to set them up roughly, but the geometry will have to be done properly at some point.
  • Footbrake works really well, initial travel is a bit spongy, but they bite good and firm. Happy with that.
  • Handbrake - not so great. It works but only just and at 8 clicks is no good. Will have to adjust the cables and see what happenes, although the adjustment is only supposed to be for cables stretching over time. Will see what happens with that.
  • Steering is fine - very smooth and precise.
  • 20mins of effort for of rigging/dragging cars around for a15second roll... means I have to get this engine running ASAP! Or cancel the gym subscription...
So all told, pretty awesome week. I'm happy with everything that I've achieved, really grateful for the help and support from friends and other builders, and GKD pulled out all the stops to ensure I achieved this milestone. Only fair that I actually made it then! The car is also starting to look awesome, which makes it all worthwhile.

Next I'm going to turn attention to the manifold and cutting the aperture for the exhaust primaries, and fuel tank. I believe I'm about 50% through the build now, although with the wiring loom, ECU and engine start I reckon I've got some interesting times ahead.

I've also been told by Peter that there's a slight change on the cards ref. IVA and how the foglamp is activated - has to have a buzzer to tell you it's left on when the key is out of the ignition, or not be latched by a "hard" switch. Only a minor thing but it technically means my loom will have to be modified, and therefore I'll have to wait a bit longer for it... Still, never mind, plenty to be getting on with.

Thanks for reading!


.

Sunday, 16 June 2013

Putting the brakes on the project (in a literal, not a figurative sense you'll be pleased to read)

Time for another update!

Had another very productive week - most evenings and a long Saturday up at the workshop, pressing on with the Legend.

Emma, or the "kit car widow" as she now styles herself, has been more than generous with my curfew allowance these last two weeks, and so been able to really get stuck in (thanks!!) Didn't save me from the perils of a DIY Sunday though, and whilst fixing and also breaking the toilet at the same time, there was a suggestion I would have been better off up at the workshop today (a tactic I must employ in future) 

So this week has seen lots more painting and the assembly of the rear brakes.

First off - stopping power.

The eBay specials arrived, and I excitedly set about fitting them. Only to find the calipers didn't fit around the disc. Stumped I hit the drawing board and poured over the instruction manual. Whilst it did technically say "any BMW Rear discs", it latterly went on to say "any BMW rear discs that are 10mm thick". Standard 328i discs  (that which I bought) are vented and 24mm thick. Standard 318 and 320 discs are solid and 10mm thick. (that which I then went out and had to buy the next day). 


Sorted. For ease of purchase I decide on non-grooved and non-drilled discs on the rear, and having spent an extra £36 but hey ho, small sacrifices in the scheme of things. Plus I'm sure they'll stop plenty good all the same, and I've now got a set of grooved/drilled 328i rear discs to eBay :-)
Well what do you know - a 10mm disc fits inside a caliper designed for 10mm discs

I had some issues, or possibly perceived issues that weren't; with the handbrake and the caliper. There didn't seem to be an obvious method for attaching BMW cables to VW calipers. In the end I filed down the "nipple" on the end of the cable to allow it to pass through the actuating arm and put a nut and bolt through. Not sure if this is IVA friendly, but can easily be addressed at a later stage by taking off the rear wheels, so will do for the minute. I later read, somewhat coincidentally,  on Steve Tullinge's Blog http://stevesescaperoute.blogspot.co.uk/ that's precisely what he did; so must be alright.


Cable nipple doesn't fit in the caliper - plus had to actuate the caliper a little bit "on" to get the nipple through after filing. Hope the pads don't drag?

Seems to have worked OK - need to test the pads for drag, can't do that until they're bled


To test the function of the rear brakes without going too much further forward, and to see if this nagging doubt about dragging pads would continue... I decided to put some fluid in and bleed them up - more to see if the handbrake was OK. I jury rigged a temporary reservoir and fed the rear brake master cylinder with fluid. I didn't have the correct adaptor for my pressure bleed kit, so I made a self bleed tool with a bit of rubber hose, bunged the end and put a slit in it with a stanley knife - the pressure opens up the split and lets air out, but when you release the pedal the slit closes and doesn't draw any more air in. Simple, but effective, and best you can hope for when you're on your own. This allowed me to get some sort of braking and test all the functions. Pedal feel wasn't great but then I wasn't expecting it to be as the front master cylinder had no fluid in it.


With a wheel on you could spin the wheel freely, and by pressing the brake pedal or pulling the handbrake up it stopped and wouldn't move. Perfect! Job done. Might need some adjustment on the handbrake as it was a good 8 or so clicks, but once all the brakes are bled properly I can sort that out with the cable tension adjuster.

I suppose at this point I could have fitted the proper reservoir to the ally bulkhead, but it wasn't yet painted, and the instructions specifically tell you the bulkhead has to come out, so the temporary rig was OK and barely any work at all.

So the rest of the week was all about the painting again. I'll let the pictures tell the story here


Final results were not too bad - again, a bit orange peely as you can see from the last one, albiet this was still wet. I'm still quite pleased with the result, I'm by no means a professional sprayer, and my total training amounts to 5mins at lunchtime in the spray booth at work with the painter stood over my shoulder letting me having a go at a test panel! 

It dries out a bit better, perhaps if there's time at the end I'll flat them back with 1000grit and go over them with a light coat.

I also had to delve back into the rats nest of the original wiring loom and find a few connectors to send off to Peter - to make up the interface loom between the EWS, key transponder and the engine loom

So glad I labelled everything!!

Out of all this I only need..

...These - EWS connector(s), key transponder connector and main engine loom plug


earlier in the week picked up some tires - budget ones, for now; but pretty happy with them. they get a good write-up online and were only £60 per tire fitted.


c'mon... put your back into it! Actually I wasn't being overtly lazy, just in my suit and not about to risk Mrs O'Mara's reaction to tire marks all down the front of it


Then last thing Sunday, couldn't resist just gently placing all the panels in-place and putting a couple of the wheels on - really is starting to come together now and looks very exciting. I think you need little psychological "wins" along the way as it's good for morale. As one of my friends commented it looks like a tiger at present...


So next week I'm hopeful and very keen for GKD to send through the front uprights and rear track adjusters - that way I can complete the following:
  • Rear suspension
  • Front suspension
  • front brakes
  • connect up steering
  • bleed brakes and then...
Lower it gently onto its wheels!!


Hopefully there'll be some other goodies on their way too, loom, side panel and steering shafts. And as Emma jokes at that point I won't need to worry about engine start, because I can make "vroom" noises and she can push me!

Thanks for reading, see you next time.